No Products in the Cart

Cleaning and preening is what the Mothers® Detail Guide is all about. From the simplest tasks to the most technically challenging, our Guide covers it all.
Posted on May 7, 2021
At the core of the auto-detailing experience is applying a perfect coat of wax. Shiny wheels and chrome and a jet-black canvas top might be pretty, but putting a superior glow in your paint with the polishing and waxing process is where necessary perfection begins and ends. Mothers® started out with waxes and polishes: we know how. We also know how to set the stage for perfect wax; this section has the tricks for properly prepping your vehicle’s paint.
Before you put anything in contact with the paint on your sled, you need to know a little about automotive paint. It’s not just a layer of color, and it’s not like the paint you slapped on the wall in the rumpus room. Traditional single-stage automotive paint (“old” car paint, though it is still used occasionally) is a layer of color applied to a layer of primer that has been applied to a body panel that has been given an anticorrosive cathodic coating. The colorcoat (typically enamel, up to one millimeter thick) bonds with the primer, which has bonded with the body of the vehicle. When you work on single-stage paint, you’re working the color layer, so you’ll see some color on the polish applicator and buffing cloth.
Almost all factory paints today are multi-stage (the stages referring to stages of the application process). They’re formulated to improve durability, and are baked on using special lights (while truly exotic paints are dried using sharks with laser beams attached to their heads). An anticorrosive treatment is given to the body panels (be they fiberglass, metal or urethane), which are then coated with primer and given a very thin colorcoat, which is followed by a relatively thick clearcoat (in other words, clear paint). When you polish multi-stage paints (those with a clearcoat), the clearcoat won’t give up any color. Keep in mind that the clearcoat is protecting the colorcoat – so you don’t want to see color. If you see factory paint peeling into a white crust that flakes away and leaves a dull color behind, that’s the clearcoat dying, and you can’t save it with polish (time for new paint).
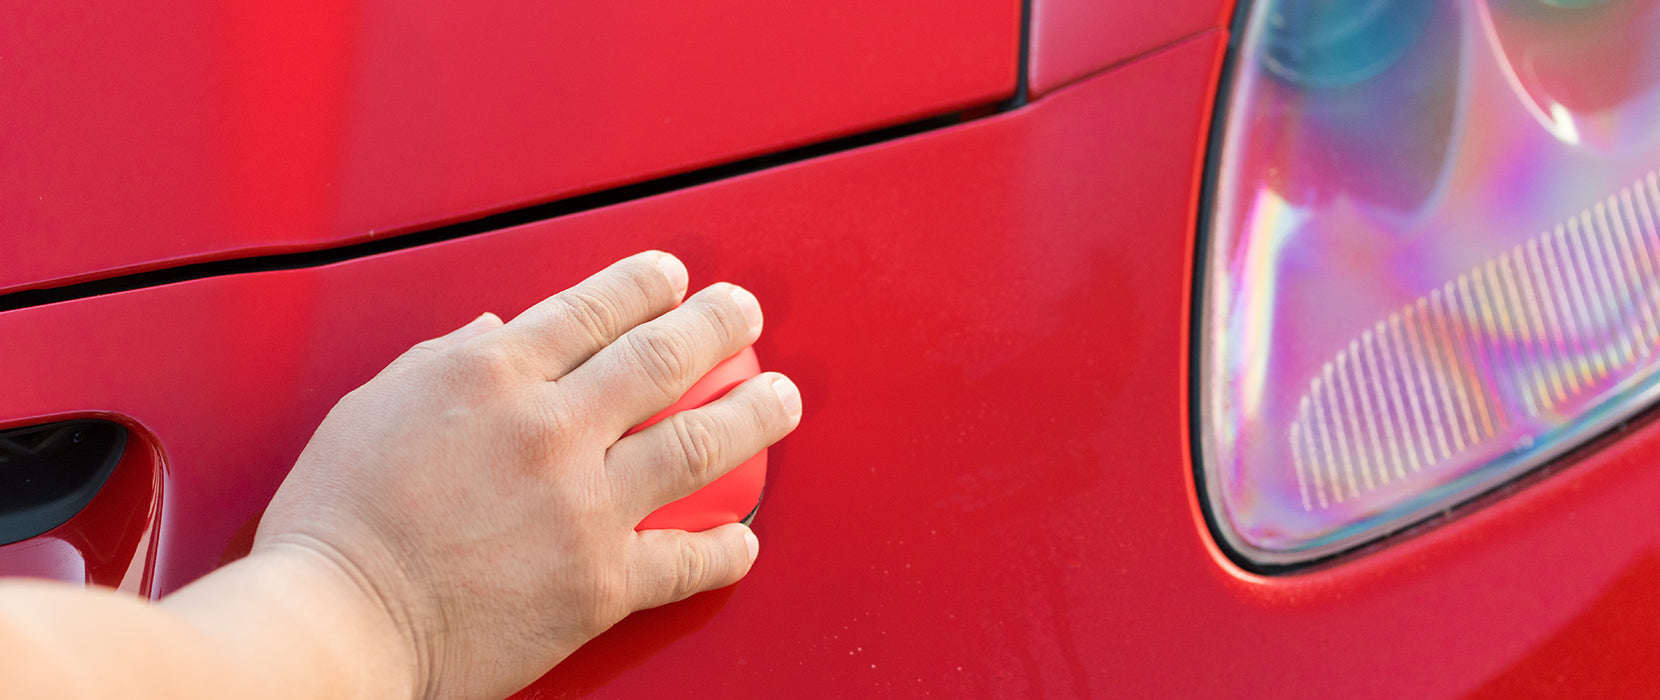
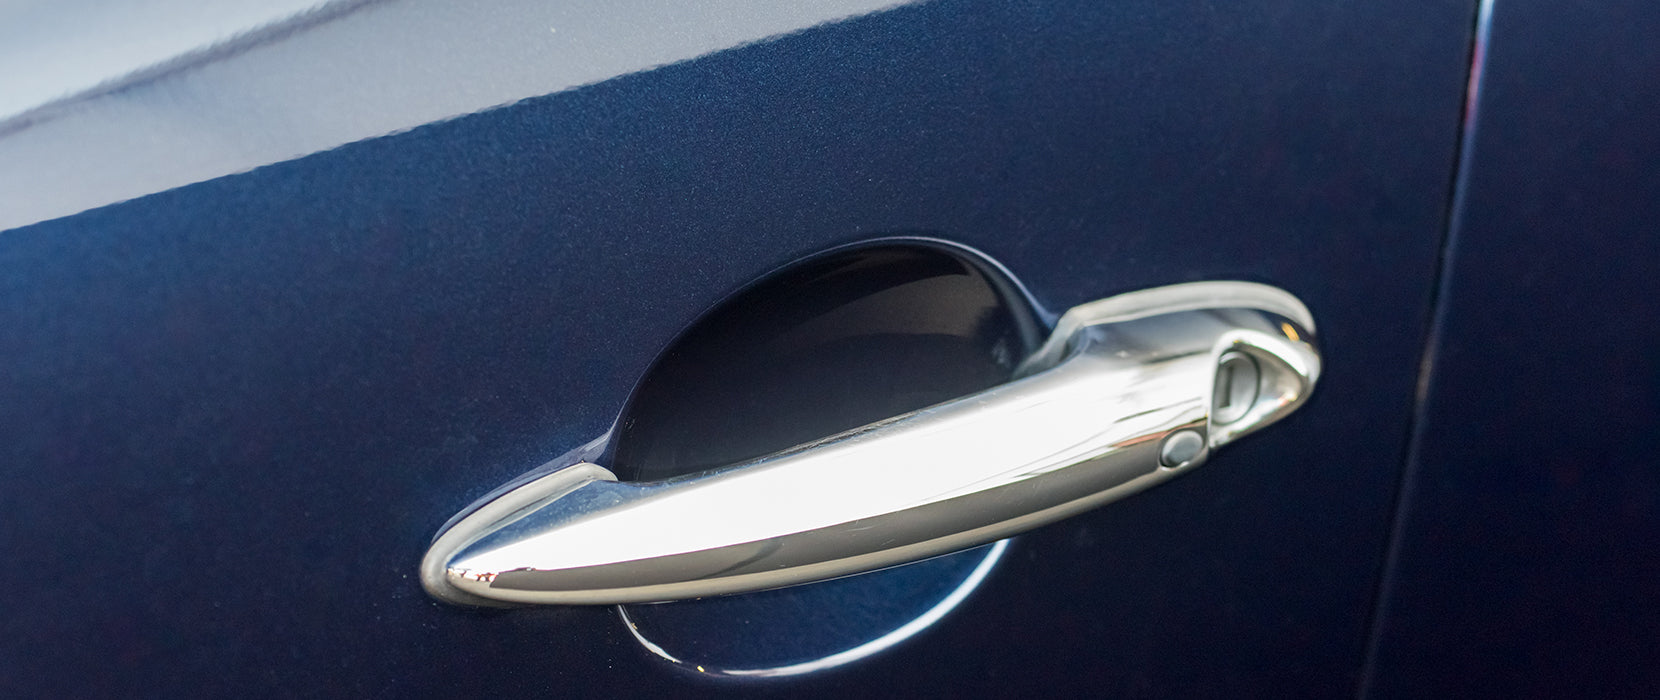
Why use an automotive clay? Because it is uniquely capable of removing the tiny nits and bits that destroy fine automotive finishes at a microscopic level. Try this: draw your hand across the hood of a freshly washed car. While you’d expect fresh-cleaned smoothness, you’ll feel lots of little bumps and detritus still attached to the finish. Tiny sticky stuff, such as dust and airborne plant matter, and sharp things like microscopic bits of glass and splintery metal fragments (research “rail dust” and you’ll never park near train tracks again) can glue themselves to or stick in your paint, and the normal sponge and soap job won’t remove them. A clay job can.
Mothers® has promoted the use of clay since the ‘90s (and sold a gazillion clay bars since then), but you’ll always encounter people who don’t understand why it’s awesome. Perhaps this how-to video from Mothers® will help your case. The use of clay is not supposed to be a well-kept secret, and the more folks you tell about it, the better everyone’s car will look. The best place for folks to start is Mothers® California Gold® Clay Kit or Speed Clay 2.0.
First off, to use clay, your sled must be freshly washed. You can’t clay a dirty car. Well, you could, but the clay will choke on all surface dirt, and probably scratch the paint. When working on a clean surface, the clay’s effect is concentrated on picking up the superdirt and paint-embedded particles left behind following washing.
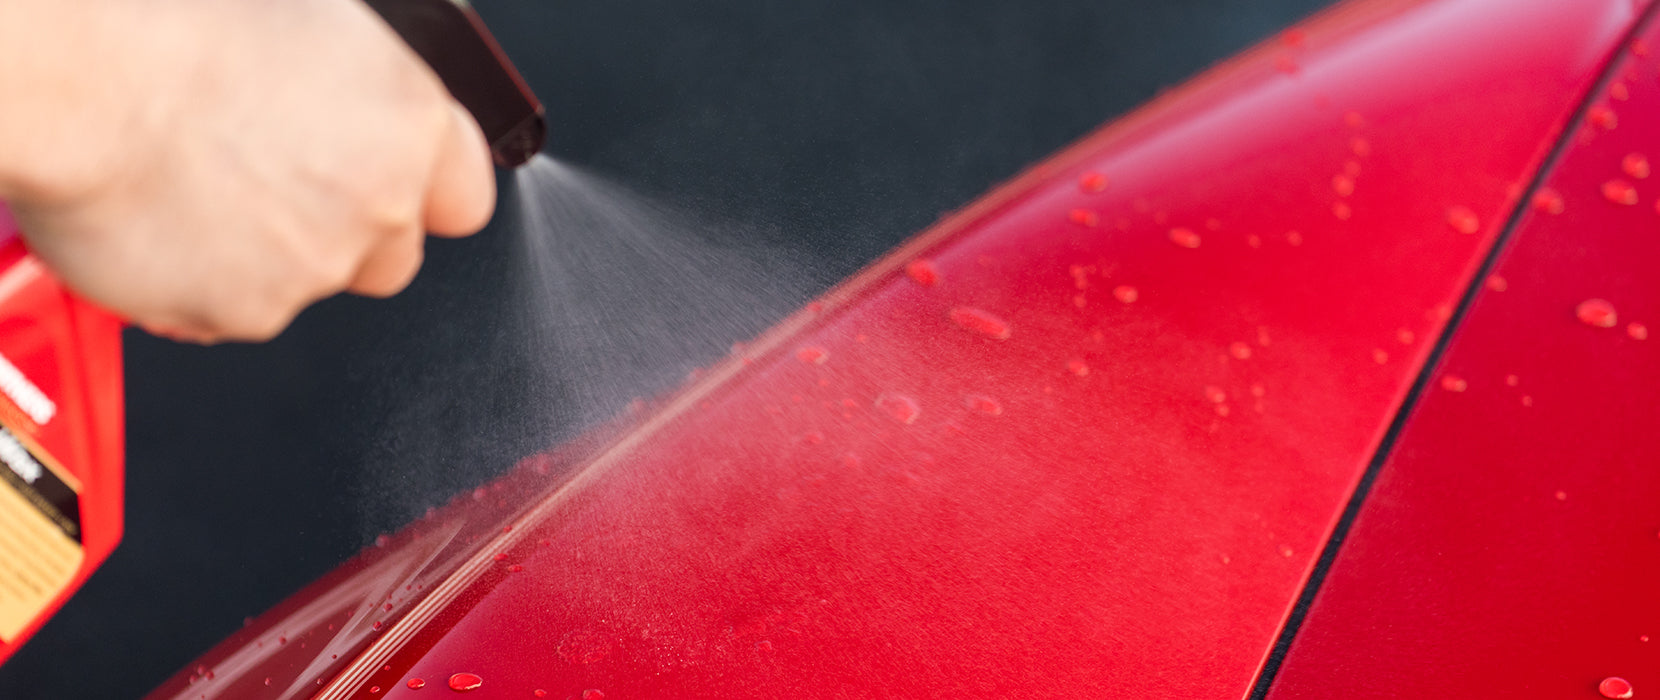
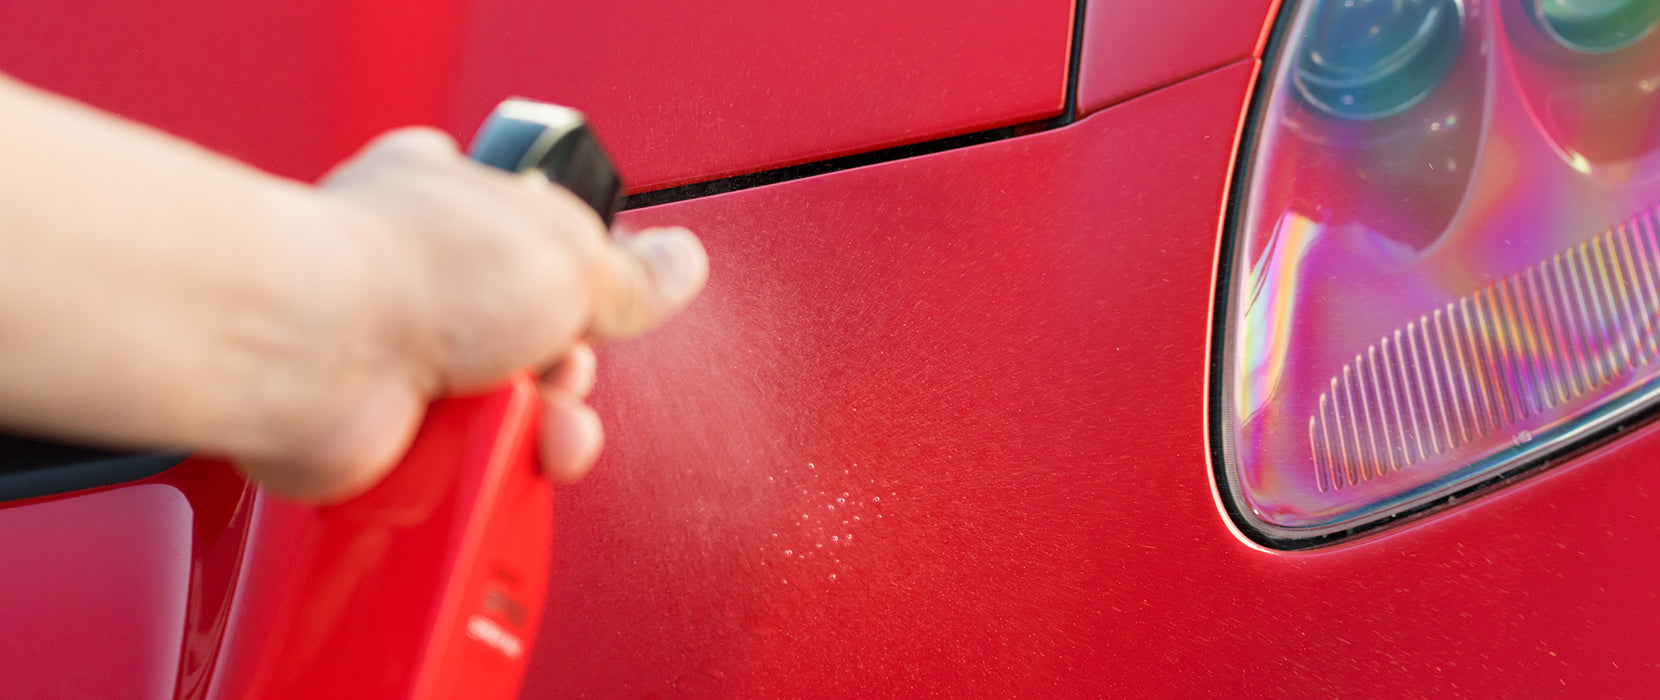
Using the clay bar requires a layer of detailing spray on the washed surface. This lubrication is a necessary element of the claying process. The film of detailer serves to defeat the clay’s tendency to stick to paint, permitting it to glide on the surface of the paint.
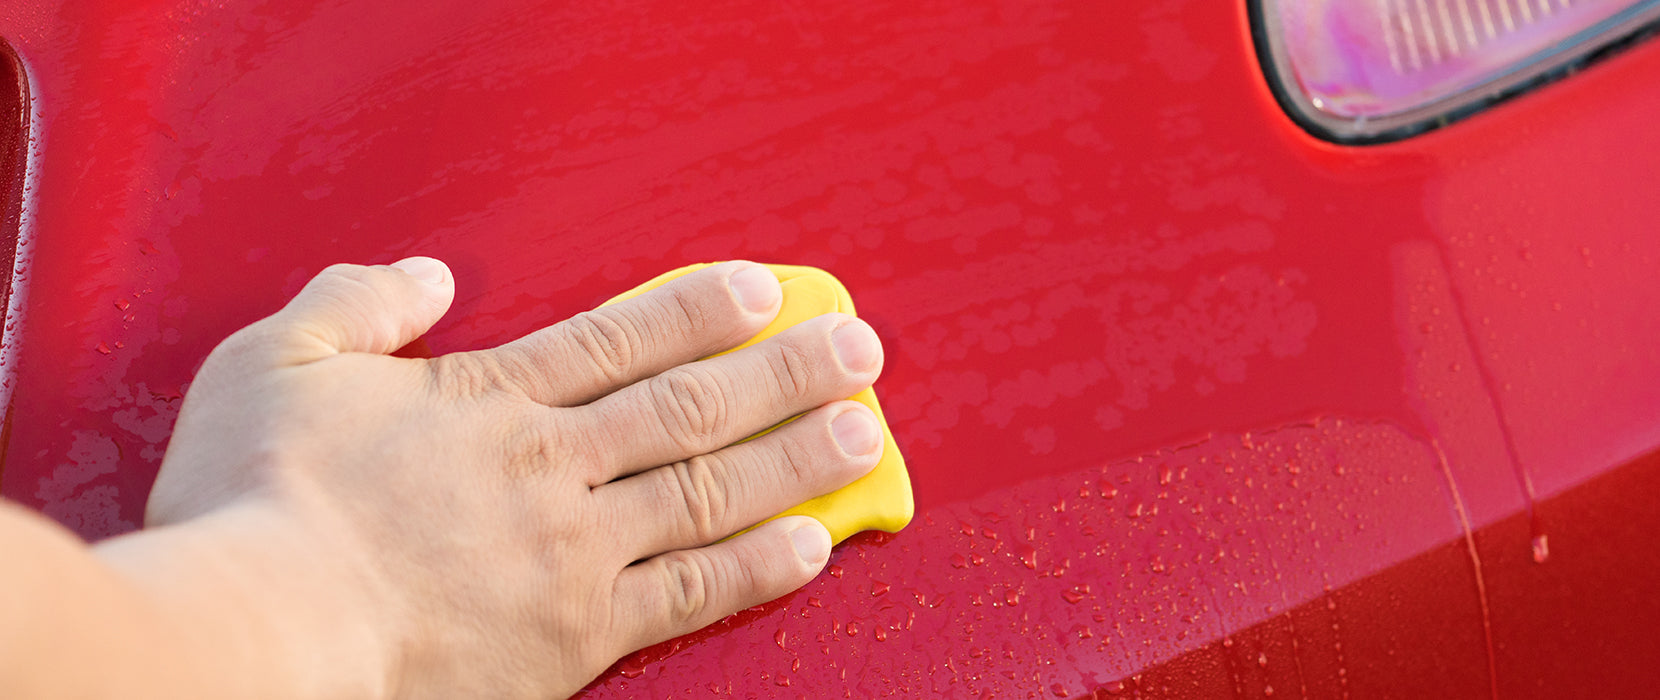
Spritz on the detailer in close advance of the clay, working section by section, and lightly slide the clay on the paint’s surface. You will feel it working on debris stuck to the paint. When the clay slides smoothly, stop and wipe off the detailer, and move to a fresh section of paint.
Don’t be stingy with the detailing spray; use enough to guarantee good slippage. The clay bar must be sliding on that film of detailer to work properly – using clay on paint that’s underspritzed means repeatedly overcoming its stiction with the paint, which causes it to skip and leave trace clay deposits (and could distort the finish). If any clay does get stuck on the paint, return to it with more detailer and the clay bar, and it’ll pick up the clay left behind. Contrary to some statements, water doesn’t offer enough thin-film strength for clay to move properly – use a detailing spray.
When using Mothers® Instant Detailer for clay work, it can be wiped off in the same fashion as it would when used as a detailing spray. If the instant detailer dries, it can be removed by spraying on more and wiping it off immediately.
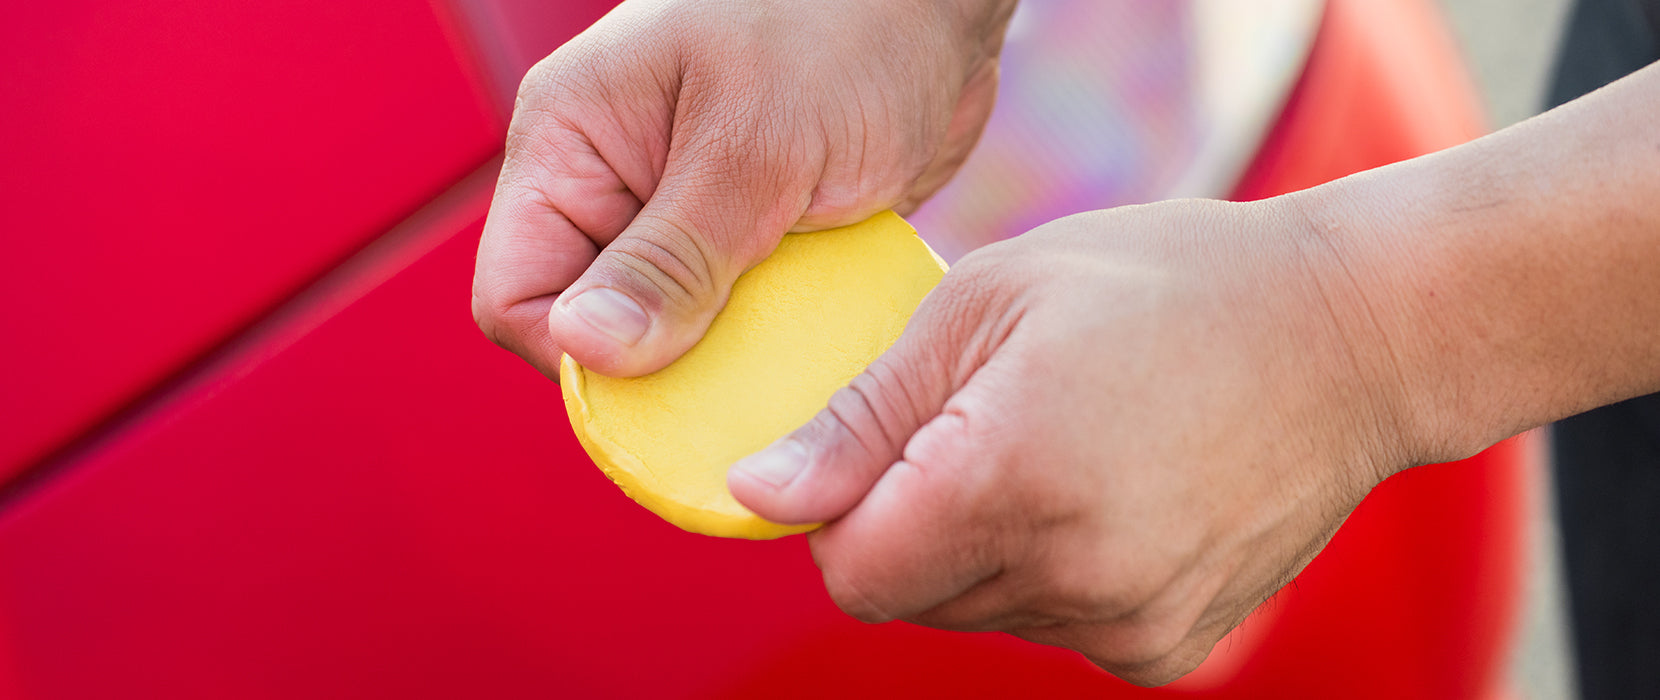
While using a clay bar, knead it regularly (remold the working surface so fresh clay is exposed, just like you’d remold Silly Putty to pick up a fresh newspaper imprint). You want a pad of clay that’s approximately one-quarter inch/one centimeter thick, formed in an oval that’s the width of your four fingers. Of course, it’s clay, so shapes and sizes may vary. If you drop the clay bar on the ground, throw it away – period. Don’t risk having rock, sand or other groundstuffs carried back to the paint. This is why you use only a section of the clay bar at a time, not the whole glob.
One of the advantages of using a clay tool is that you can prep your paint as you wash the vehicle. Here’s how it works:
Thoroughly rinse off your vehicle, making sure to hose-off all loose dirt and debris. Working one section at a time, take a clean mitt and wash, then rinse the paint. Now, soap the area again.
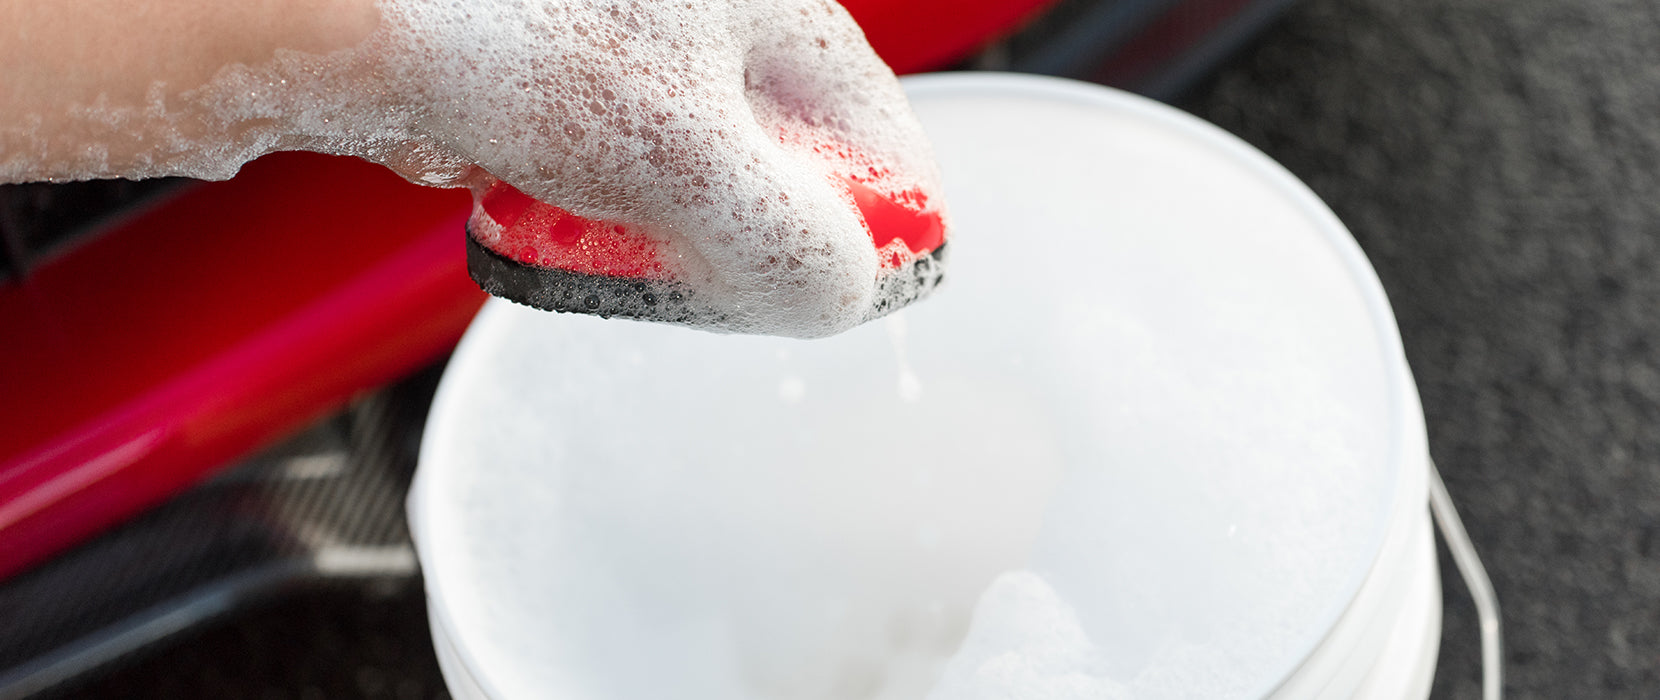
Dip the Speed Clay 2.0 tool in a suds-filled car wash bucket. Make sure it is covered with generous amounts of soapy car wash, then put the flat side of the tool on the paint.
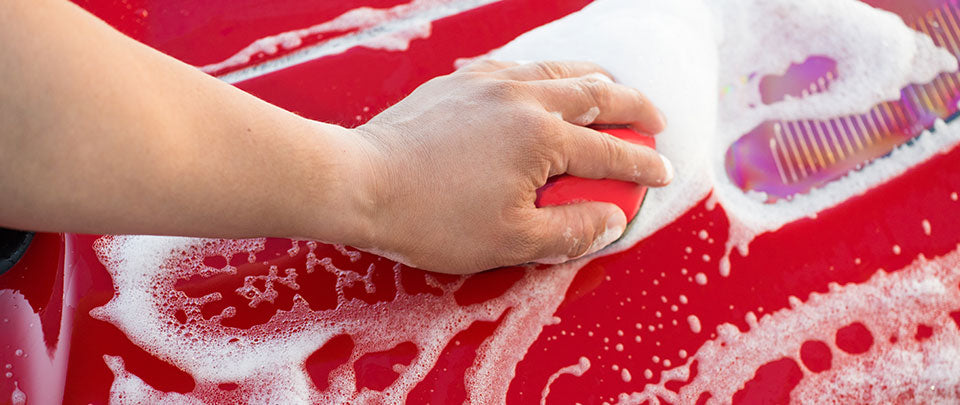
Glide the clay tool across the surface in straight, linear, overlapping lines. Continue until the paint feels smooth, then rinse. Time to move on to a new section.
Alternatively, you can use Speed Clay 2.0 with spray wax or instant detailer to lubricate the paint. Start with a clean, dry surface. Lubricate a reasonable (2’ x 2’) work area.
Gently glide the clay tool over the lubricated paint in straight, overlapping strokes. When the paint feels smooth to the touch, dry with a microfiber towel and move on to the next area.
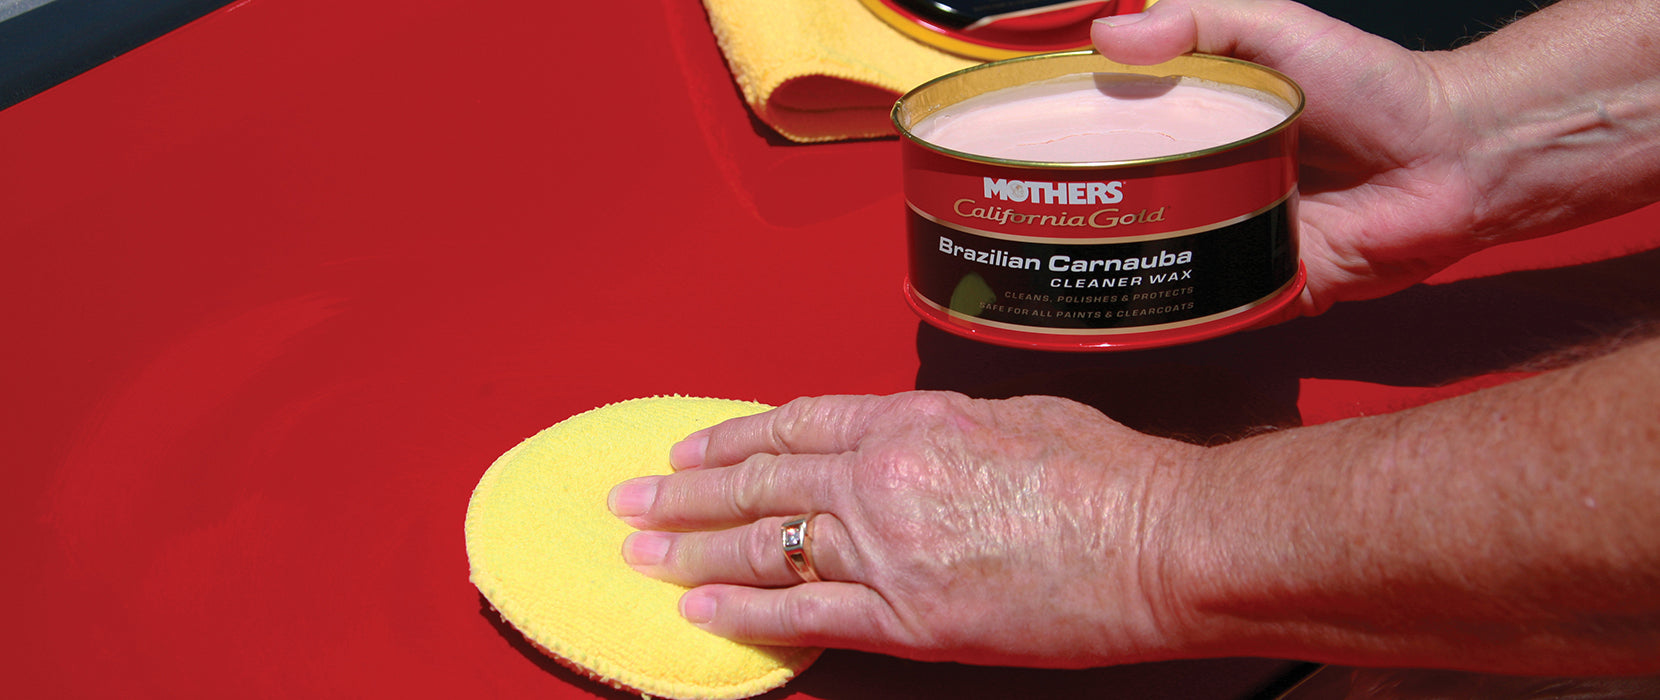
Plan on a proper all-in-one polish/wax following a clay job. In the Mothers®’ family, these include California Gold® Carnauba Cleaner Wax or Synthetic Wax. Clay is very effective at removing the worst dirt and deposits on your paint, so it’s great at removing wax too (the best deposit…).
The first goal of preparing your paint for wax is to eliminate all dirt, impurities and pieces of foreign matter from the surface. A thorough washing followed by the clay bar should do this: cleaning the paint’s surface with soap and water, then removing more tenacious particles and substances with clay, leaving the paint ready for polishing.
Polishing is the process of smoothing a surface. In the case of automotive paint, polishing (often referred to as “cleaning”) means you’re working the paint surface to round off the edges of surface-depth scratches, even out crinkling or deformation from minor blemishes, erase the etching left by water spotting, and remove evidence of paint’s gradual oxidation. You’re creating the smoothest possible paint surface.
Using an electric polisher requires technique and practice. Machine polishers (“buffers”) and the products formulated to work with them are professional-strength, while this guide is written for shadetree and hand-powered users. If you’re interested in learning about machine polishing, Mothers® has posted two videos here and here that expand on the process with its pro-grade products.
All-In-One Polishes/Waxes
Most modern consumer waxes – regardless of how they’re labeled (or mislabeled) are a combination of very mild polishes and paint protecting waxes. It makes sense, all-in-one, single step products are faster, cheaper, easier. It’s hard not to like that combination. Aggressive, stand-alone compounds manufactured for professional auto detailers may be best left to the panel beaters. Fortunately, short of beating your trunk lid with the bottle, high-quality polishes from reputable manufacturers like Mothers® will not damage a clearcoat when used per the instructions. As you’d expect, using a mild polish regularly is much safer than using an aggressive compound occasionally. However, if you’re willing to practice, experimenting with different polish strengths can net noteworthy gains in finish quality.
At the risk of being repetitive, remember that when you work automotive paint with any polish, overuse or too much force can cause damage. Let the polish work.
If a scratch or mark doesn’t catch your fingernail, it’s likely only in the surface of the top coat, and can be polished to invisibility. Some scratches are just too deep to buff out, and not all paint damage can be fixed with elbow grease. If the scratch is deep enough to catch your fingernail, you may not be able to remove it entirely (and you shouldn’t try because of the risk to the surrounding paint). Before you give up on a scratch, however, try a slightly stronger polish such as Mothers® Scratch Remover (a how-to video is available here), keeping in mind that automotive paint is thin (a clearcoat is thinner than the thickness of a human hair). When working a scratch with any polish, you should approach it with finesse, at various angles different from the direction of the scratch, and remember that your goal for deeper scratches is to reduce their visibility, not remove them (because you can’t).
Removing significant marks may require a stronger polish. Some polishes have more aggressive compounds in them, and might be called “rubbing compounds”. Tread lightly: don’t use too much pressure, or you may damage surrounding paint. Let the polish work.
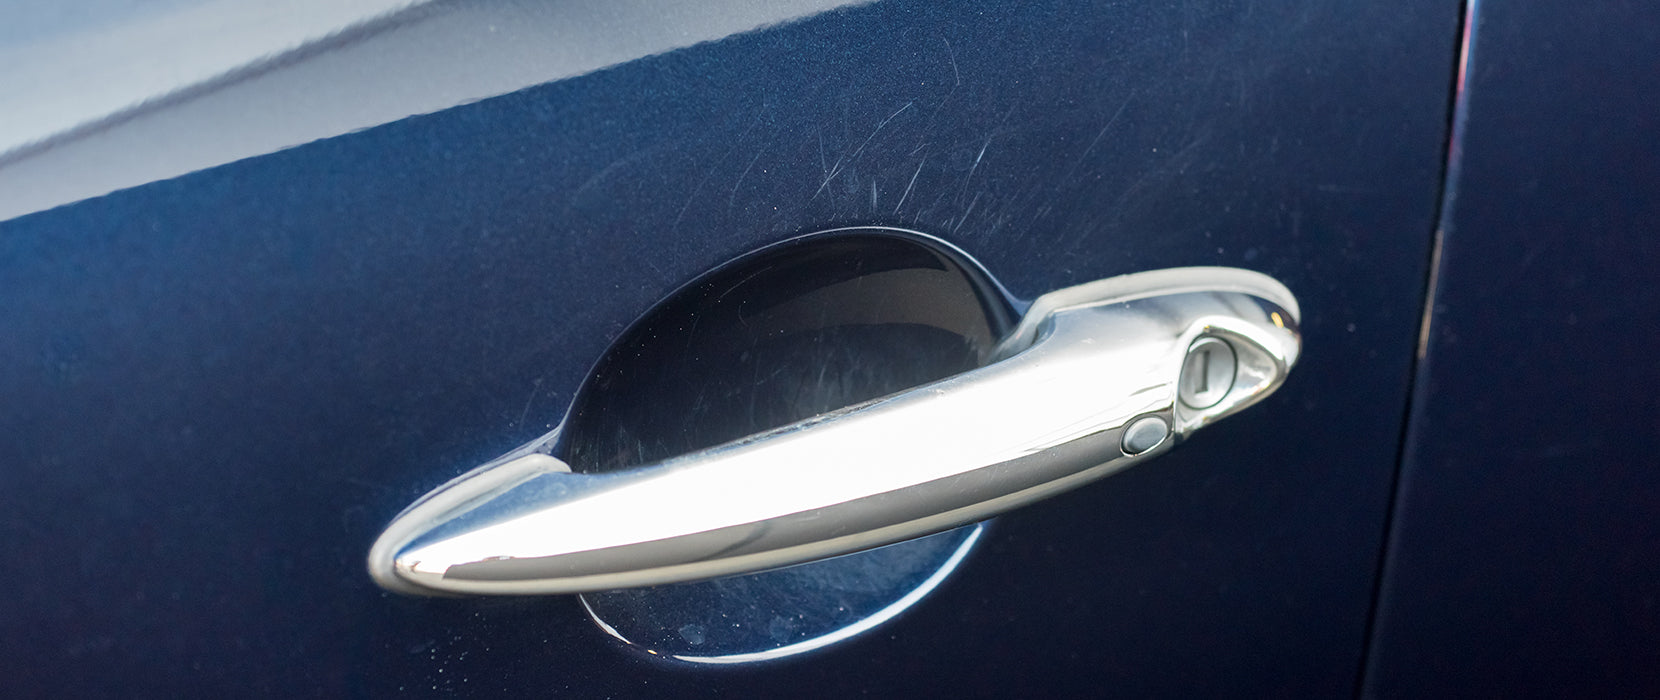
In case of more conspicuous damage in the paint, a polish with more bite may be necessary. Examples of this damage include chewed-up keyholes, hood and trunk lips, doorjambs and door edges, and the sills you step over when entering and exiting the vehicle.
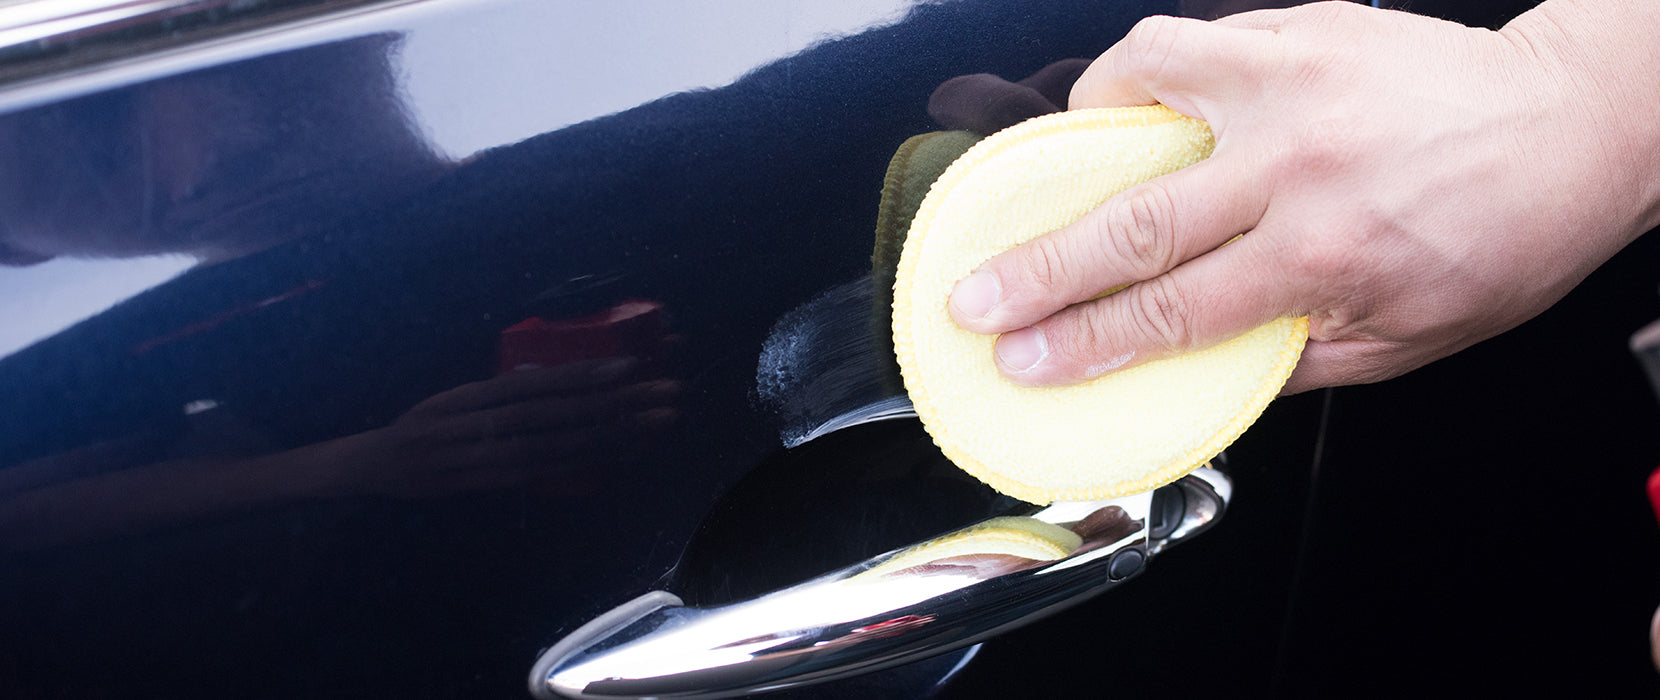
As you work, keep in mind that you’re using a more assertive polish. Being forceful could damage your paint, wear down or mar the clearcoat, or take away depth of a single-stage enamel. Don’t rub too hard – let the product work. Mothers® makes California Gold® Scratch Remover, an assertive polish for this sort of duty that’s not rubbing-compound strong.
Scratch Remover is user-friendly and easily applied, aggressive enough to have an effect on more substantial scratches, and can help smooth out the more conspicuous blemishes in your paint.
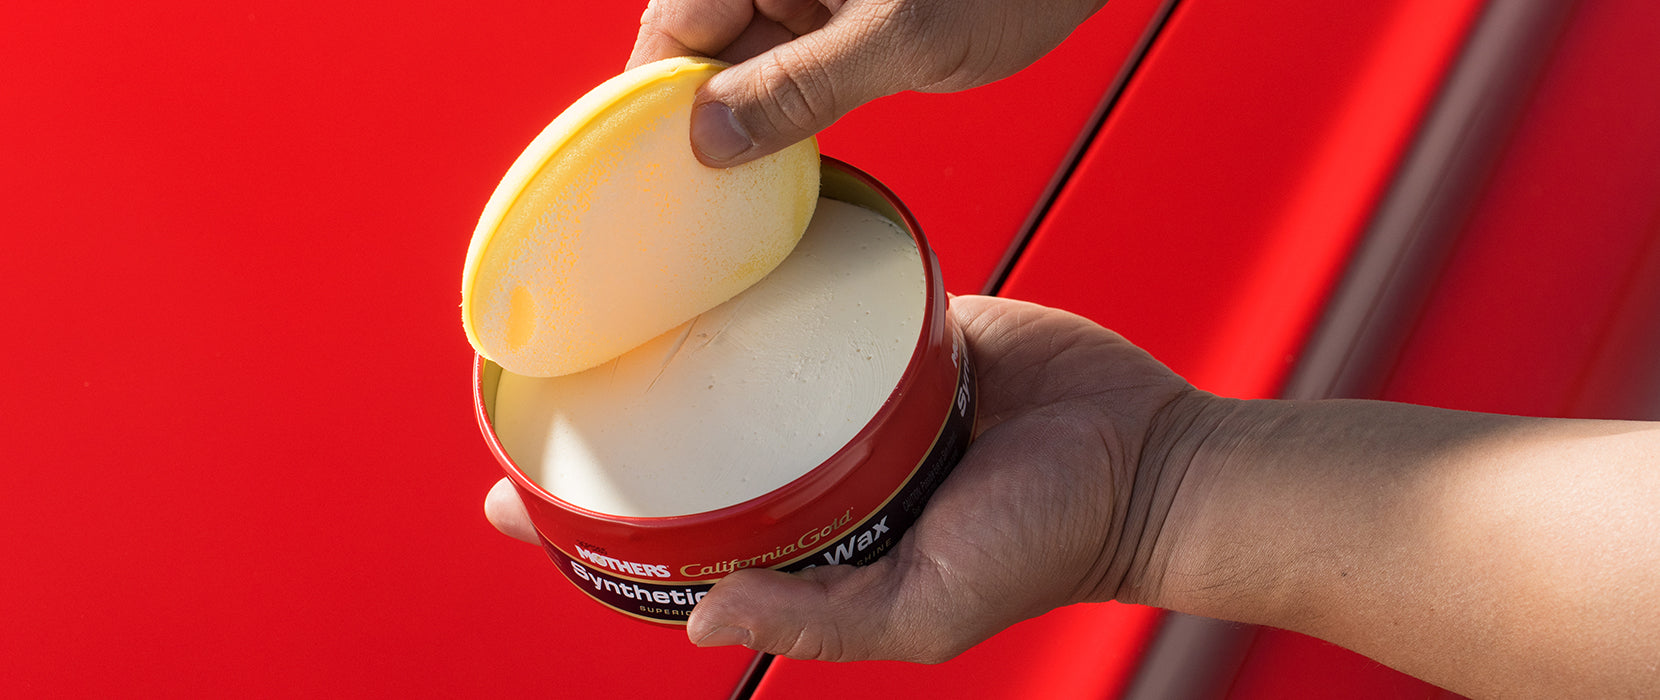
The equation for success is simple: working one panel at a time, apply your wax evenly and lightly, in parallel, circular, overlapping movements. When applying any polish, sealer, glaze or wax, use a clean, 100% cotton towel, microfiber cloth, foam wax pad or suitable applicator. Personal choice will dictate which works best (you need to be comfortable using the applicator, because you’ll be using it a lot) but basic rules apply: the applicator surface should be high quality, made of microfiber, 100% cotton terry cloth or 100% foam. Foam covered with microfiber or cotton terry cloth are the most popular, though a 100% cotton towel can be used if you fold it to work comfortably and consistently. When using paste-based products, it helps to moisten the applicator – a fog of instant detailer or a dribble of water will do. Liquid polishes are already wet enough. Click here for a quick Mothers® how-to video that illustrates the basic necessities of the process.
To protect unpainted plastics close to paint surfaces being waxed or polished, apply a rubber/plastic preservative (like Mothers® Protectant) to them before starting. Unpainted plastics freshly coated with preservative are less likely to be stained by waxes or polishes.
The product: Don’t goop on too much of the medium. Thin applications of the product work better, repeated as necessary – they’re more manageable. Remember, several small attacks are preferable to a big war. If you’re using a liquid product (polish, sealer/glaze or wax), pour it on the applicator, not on the paint, or it may leave dark, super-saturated streaks on the paint. This is especially problematic with single-stage paints.
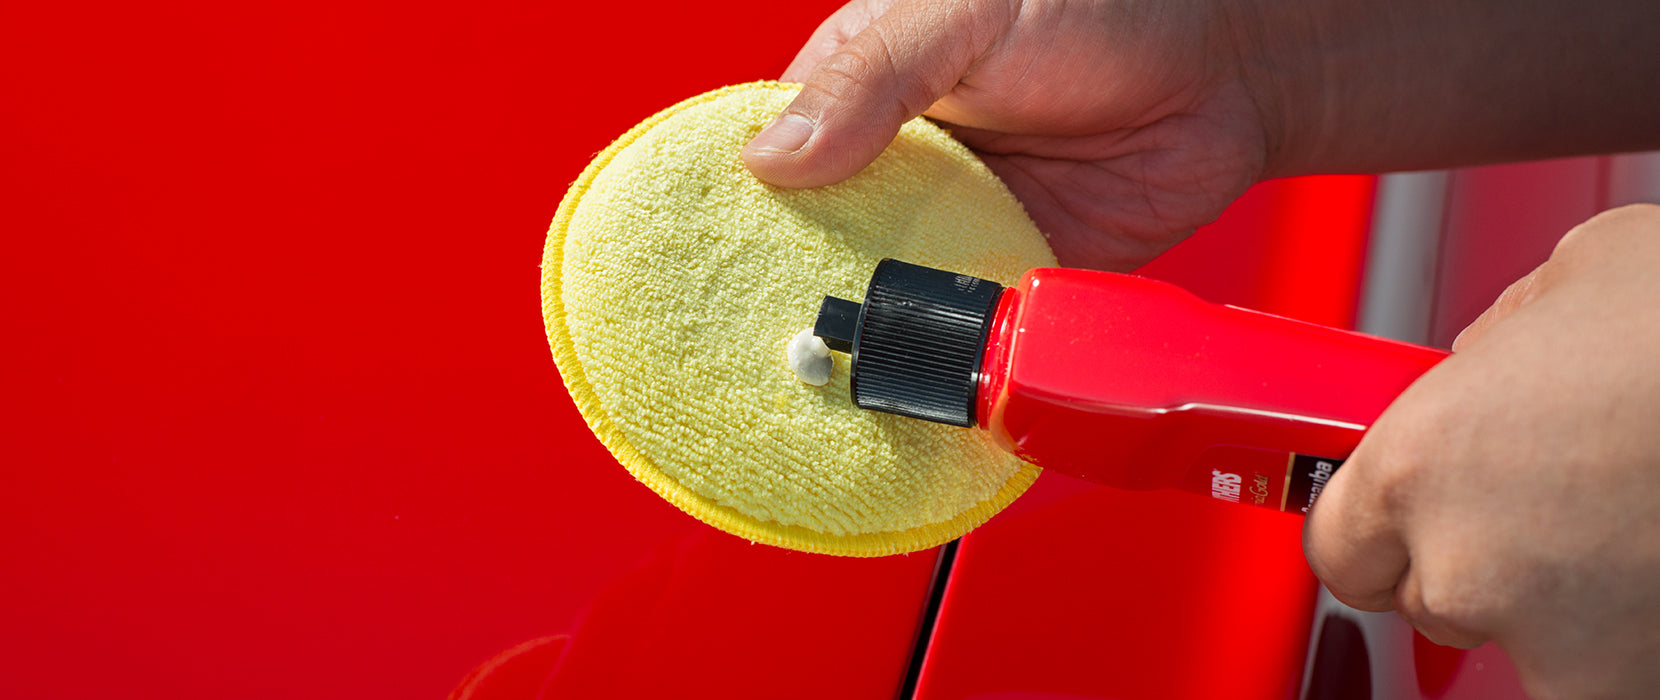
Less is more when applying wax or polishes. Several thin layers go a long way, and are more exacting than one thick goopfest. Also, avoid using a lot of pressure – this is a finesse job. To prevent streaks in the paint, pour the wax or product on the applicator, not directly on the paint.
The plan of attack: Apply the polish/wax on one section or body panel at a time (this goes for waxes and sealers as well). You can’t, or you shouldn’t (both?) coat the whole vehicle at once. Focus on the details instead of rushing your work. Also, polishes, waxes and other car products dry at specific rates, and you don’t want to get caught working on one panel when you should be buffing another. Keep a clean towel handy to remove any waxes or polishes that get into or on spots they don’t belong, such as between body panels or on trim and lenses.
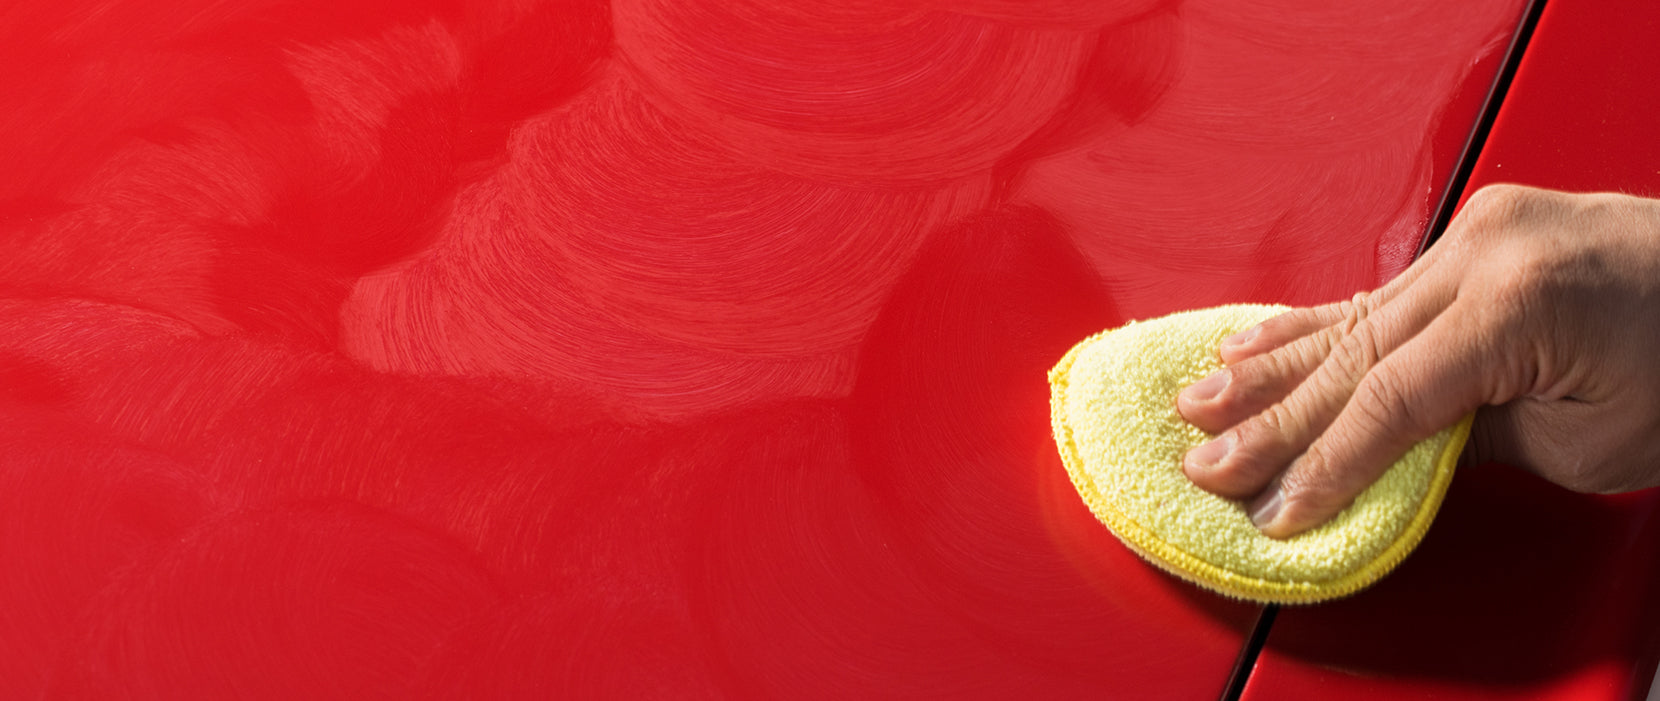
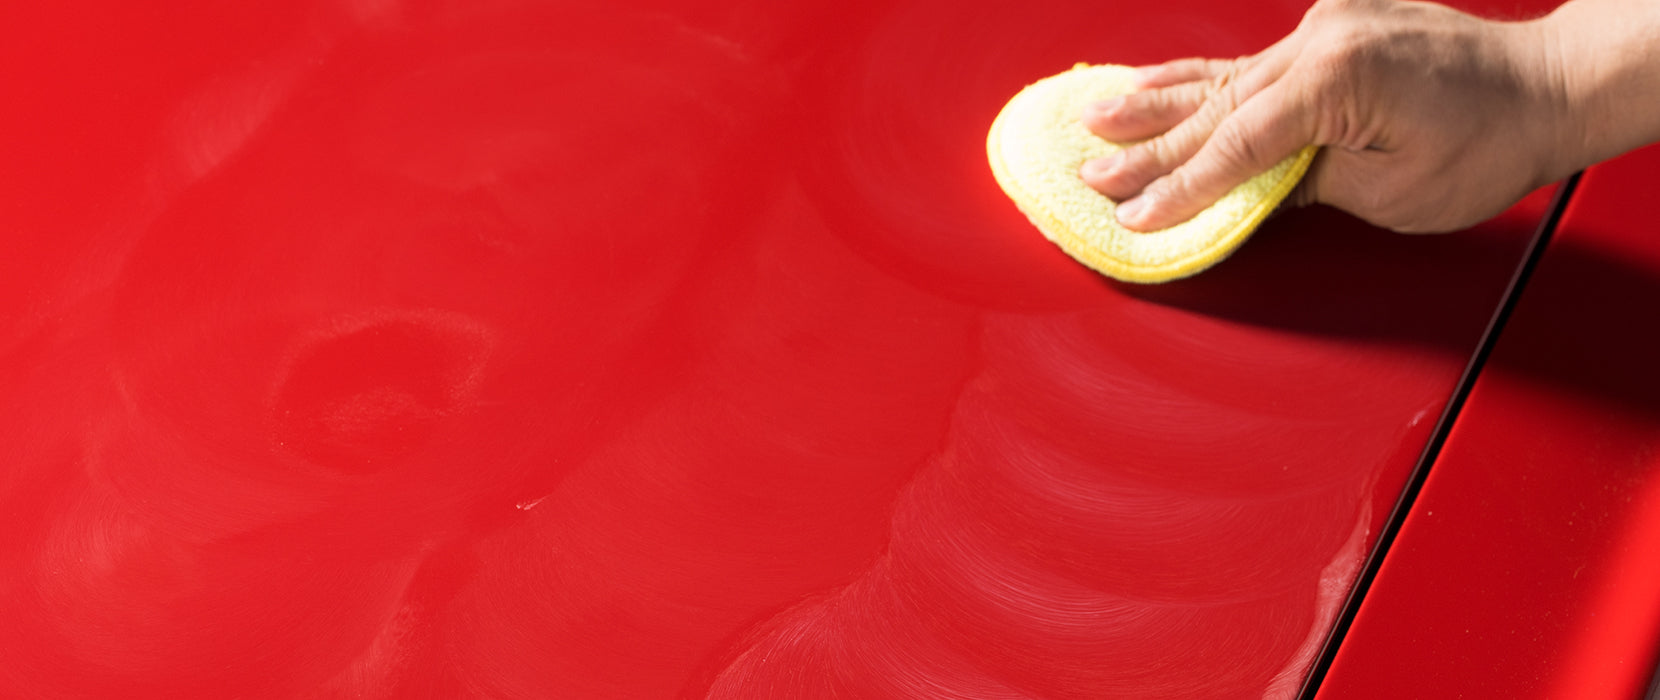
The circular motion: Work the applicator on the paint in an overlapping circular motion, moving in a roughly parallel grid pattern. The exact application motion you employ is not as important as the amount of pressure your hand exerts on the paint’s surface – wax on, wax off is just fine, but a strong set of arms can push too hard. Finesse is essential to this process. Work with a smart, soft hand, letting the applicator and polish do their jobs, monitoring the pace at which the polish impacts the surface, and how long it takes to haze over. If you’re getting tired, you’re working too hard. Rotate the applicator frequently and work with freshened surfaces to reduce the chance of uneven application or streaking. You’ll be able to see the shine return to the paint’s surface. Paints in good condition require less effort.
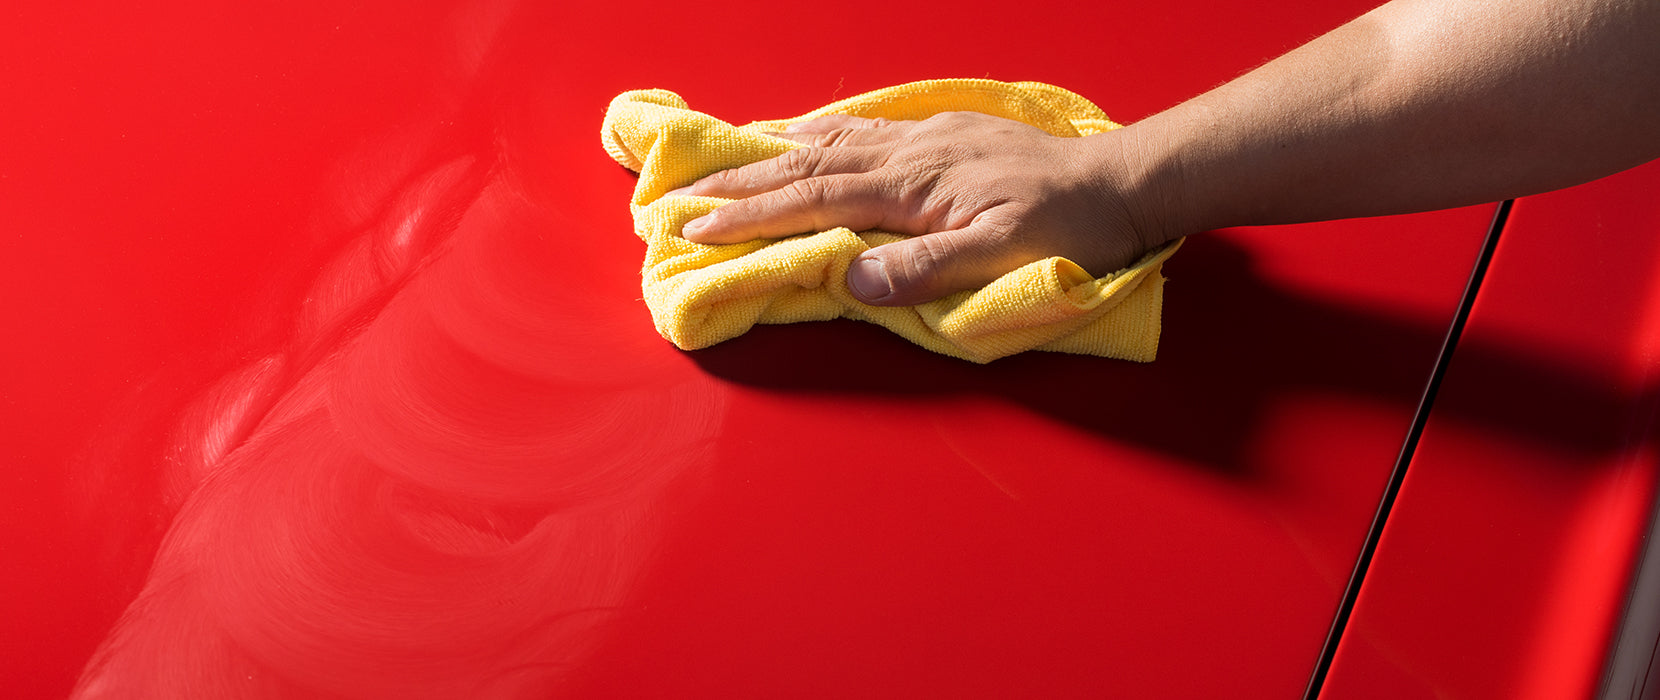
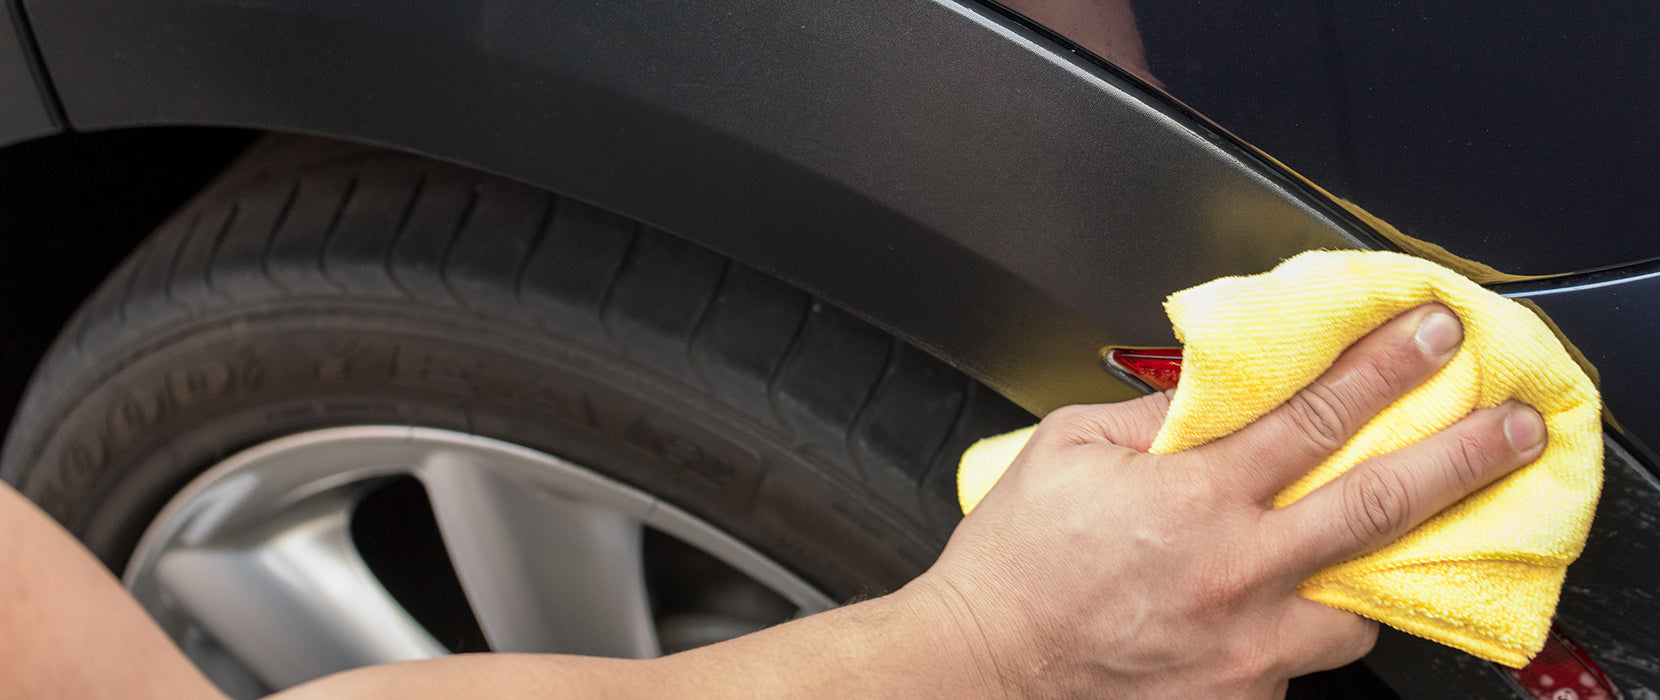
The removal/buffing process: Let the product dry to a haze (dry but not sticking to the paint) before rubbing it off. Pay attention to the pace at which it hazes over. Most want to be buffed out just as they dry, not sooner, though you should note if the polish clings to the paint surface as you’re buffing – if so, buff it out sooner. If the polish/wax is a little moist or leaves smudges when you go to buff it, wait a little longer. Products vary to what degree they like to dry before buffing, and ambient humidity and temperature affect how quickly they dry, so your attention will be necessary when starting a fresh polishing project. Use a microfiber or plush terry cloth towel when removing polishes, waxes, etc. Rotate the towel to a clean area frequently, shake it out occasionally, and start with a new towel altogether frequently.
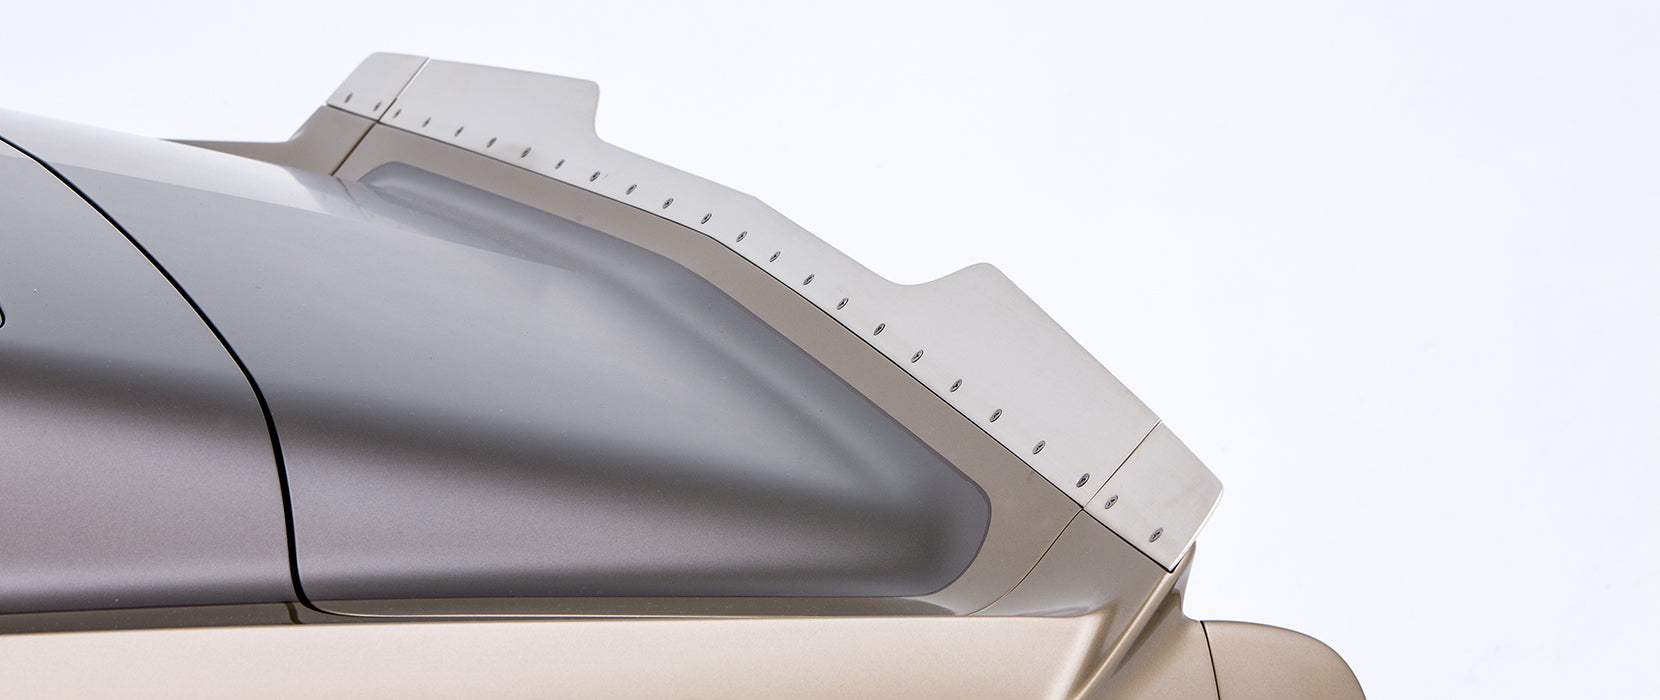
Vehicles with a primer, matte, flat, or satin finish (any coating that is intended to appear other than shiny) should not be polished or waxed. Just like you wouldn’t sand down a wooden tabletop that’s supposed to be rough-hewn, you don’t want to polish away the visual character of a vehicle’s finish that’s supposed to have the aforementioned paint effects. On the other hand, these custom sheens require regular washing, as they attract dirt faster than polished paint.
There is no wax that is 100%-carnauba. In its purest form (as found in nature), carnauba has a consistency somewhere between a hard piece of plastic and a 2×4 – you would not want it to touch your car. The formula used to make carnauba paint-friendly includes additional chemicals, and a high-quality carnauba-based wax will contain 30-35% carnauba by the time it reaches your paint.
After you finish each section of paint, remember to revisit nooks, crannies and associated parts and trim items that may have caught unintended product during the application process. There are two distinct reasons to double-check your work: polish/wax left behind can turn into annoying bits of white crud that is patently obvious to the naked eye (and looks craptastic), and product left on uncoated plastics can leave white stains that can be hard or impossible to remove.
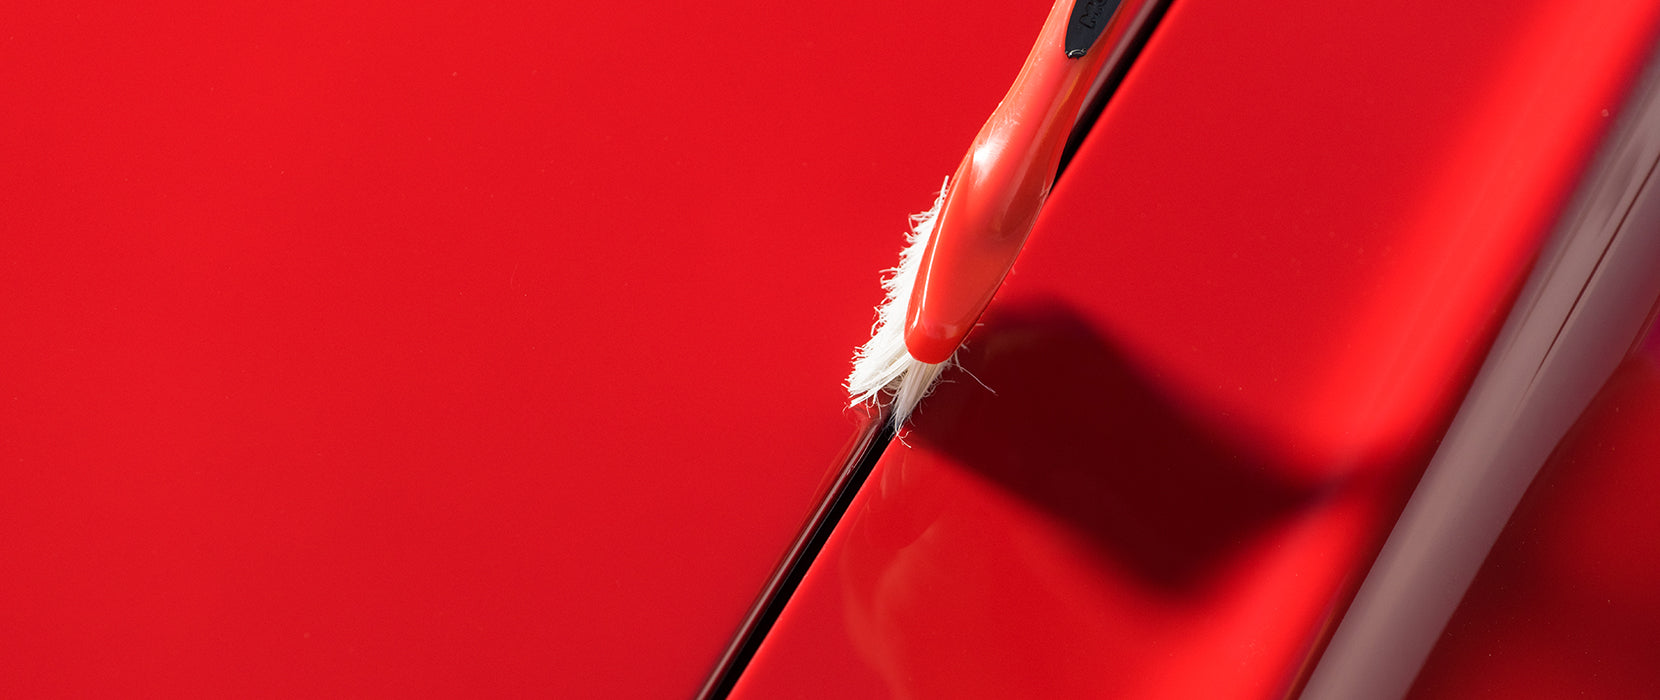
Wax, polish and sealer/glaze can accumulate in virtually any narrow nook, crack or seam on an automobile’s exterior, as well as around emblems and trim pieces. Small detailing brushes (think “toothbrush”, but softer) are spectacular for getting rid of that unsightly buildup. They’re also handy to chase dust and schmutz in the same spots.
Chasing the cruds left behind after a wax job is easy when done immediately (a microfiber or plush cotton towel works well) but if you overlook these areas until after the wax has dried, a detailer’s pick or soft (soft!) nylon bristle brush can remove the residue. For uncoated plastics that have wax stains, try Mothers® Protectant on a rag and some gentle wiping (dab! dab!), and if this won’t do it, Mothers® Back-to-Black® Trim & Plastic Restorer probably will. In dire cases of wax-discolored plastics, Mothers® also makes a plastic cleaning kit called the Back-to-Black® Heavy Duty Trim Cleaner, which requires a Back-to-Black® or Protectant chaser. If that won’t save your plastics, it’s time for new plastics.
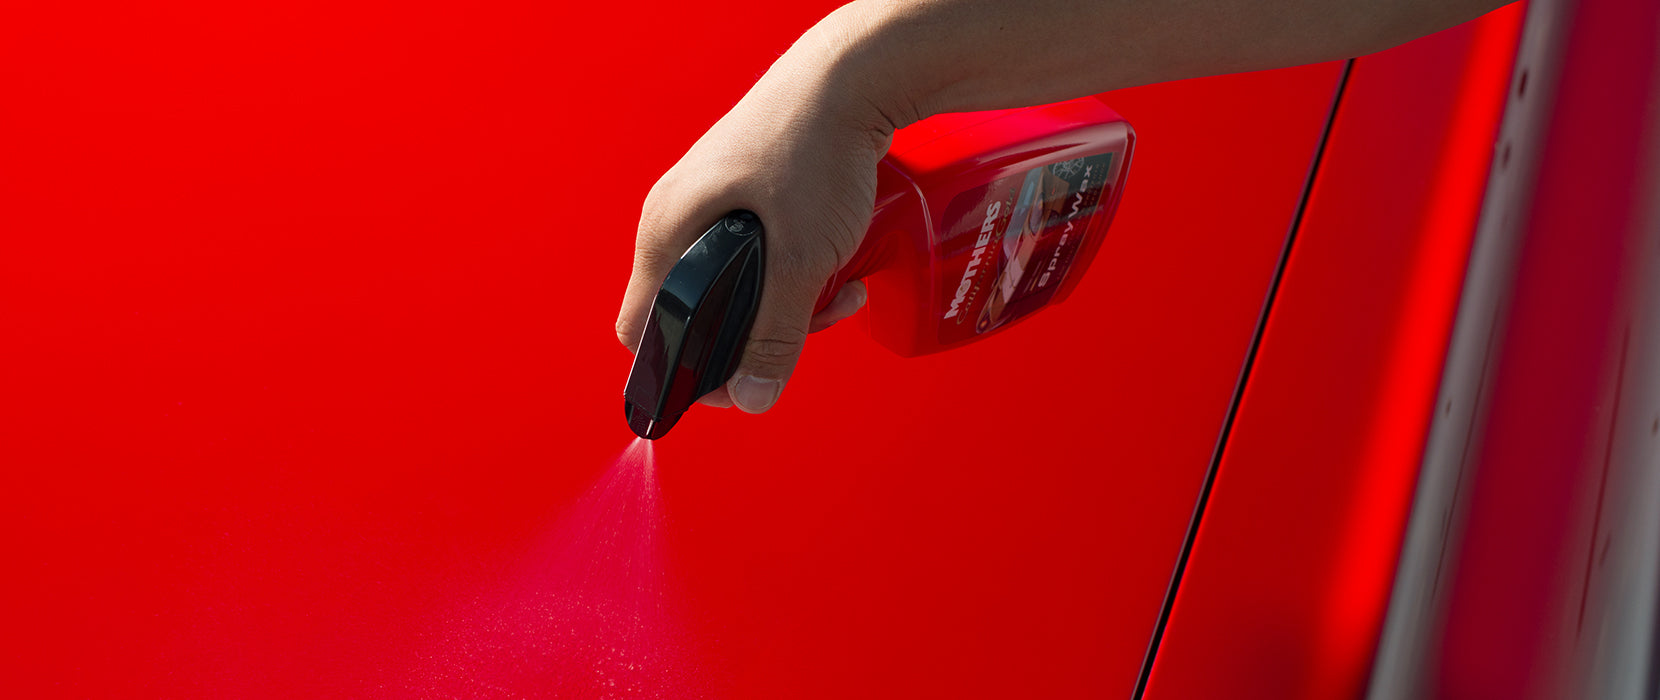
Quick detailing: Between washings, dust and light road film can be removed without water. California Gold® Spray Wax, Waterless Wash & Wax or Instant Detailer, along with Speed Spray Wax can all keep your ride clean without much effort. A regular practice of vehicle “wipedowns” can also extend the time between washings, preventing the unnecessary buildup of dirt and grime.